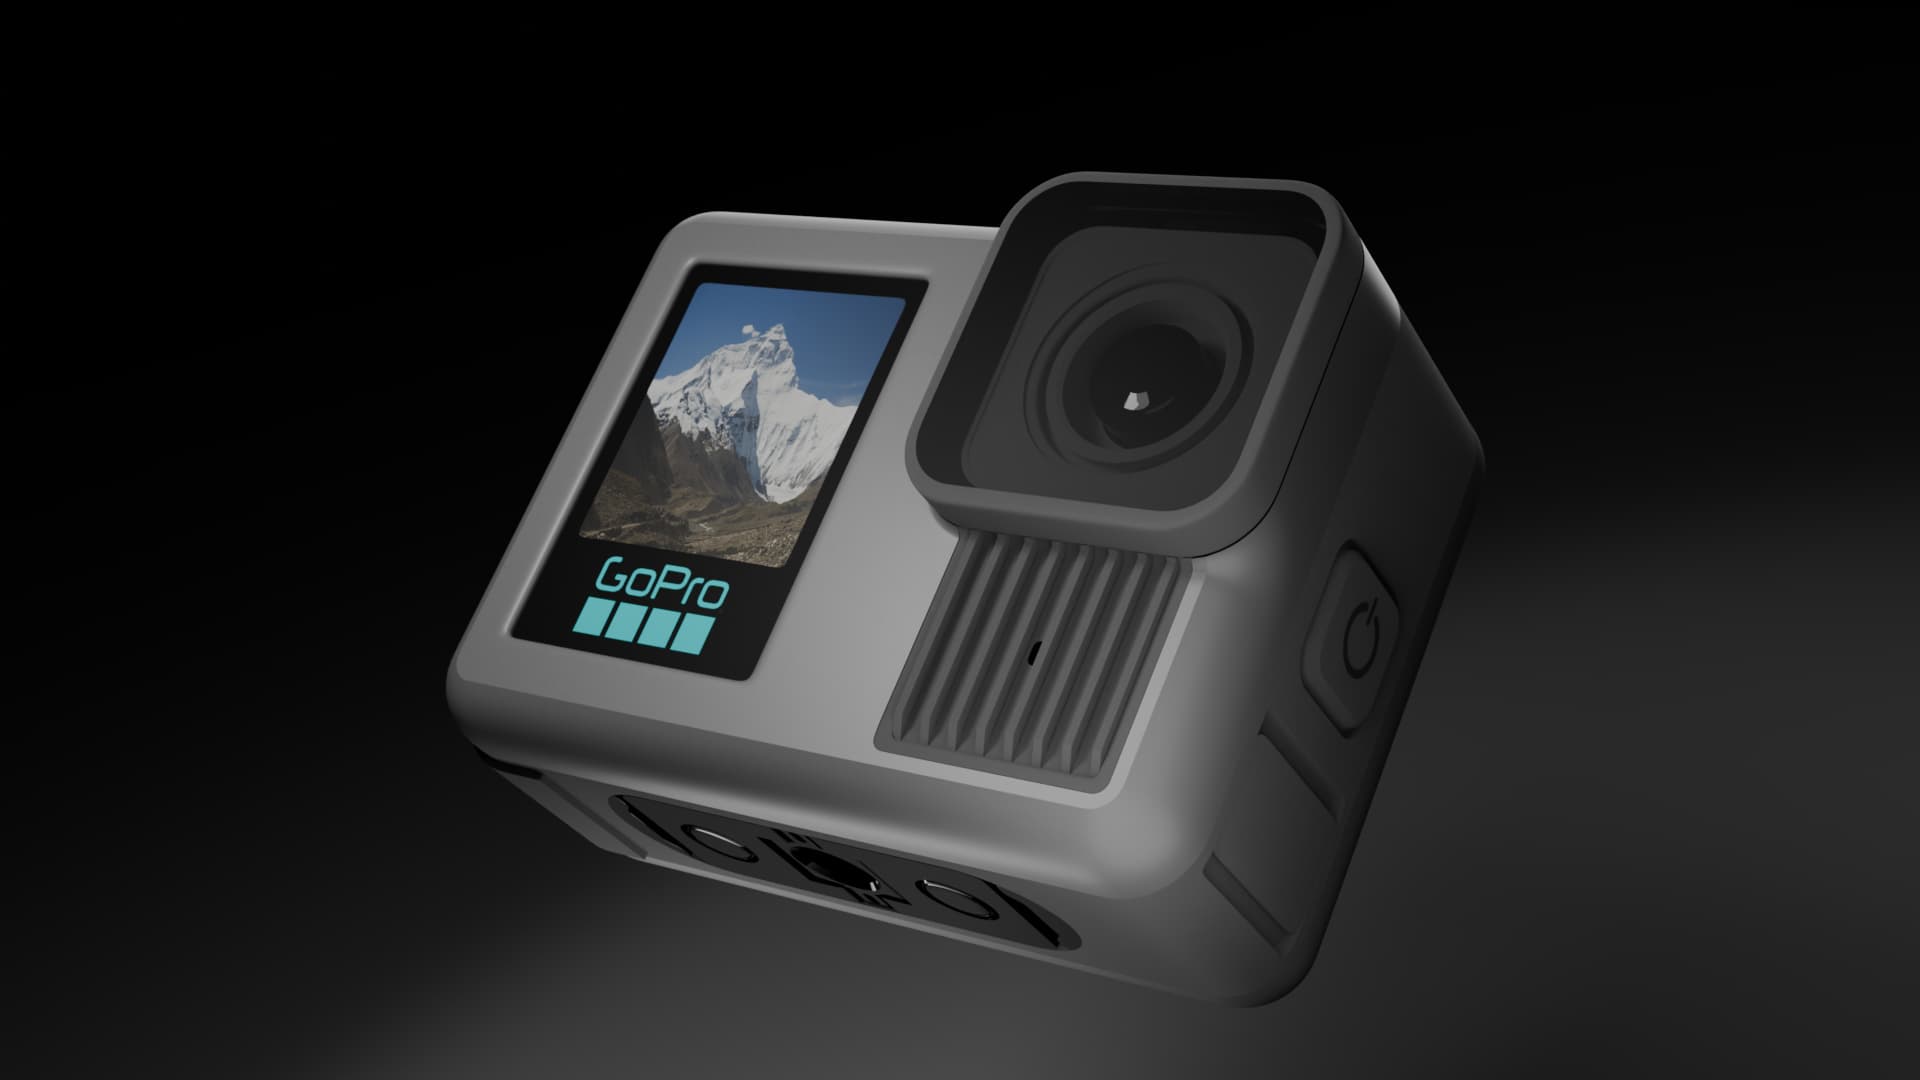
Took me approximately 24 days to model this since modelling is not my strongest feat yet.
Learn a lot of new techniques modelling this project.
-Aligning vertices using Cursor ( scale X/Y/Z axis along with the cursor to snap vertex into place)
-Mirroring a stack of selected vertices using Cursor by Scaling X/Y/Z with -1 value)
-Utilize a lot of Spin Tool technique to achieve most of the curvature areas
Great job on the modeling and render, love to see all the details too!
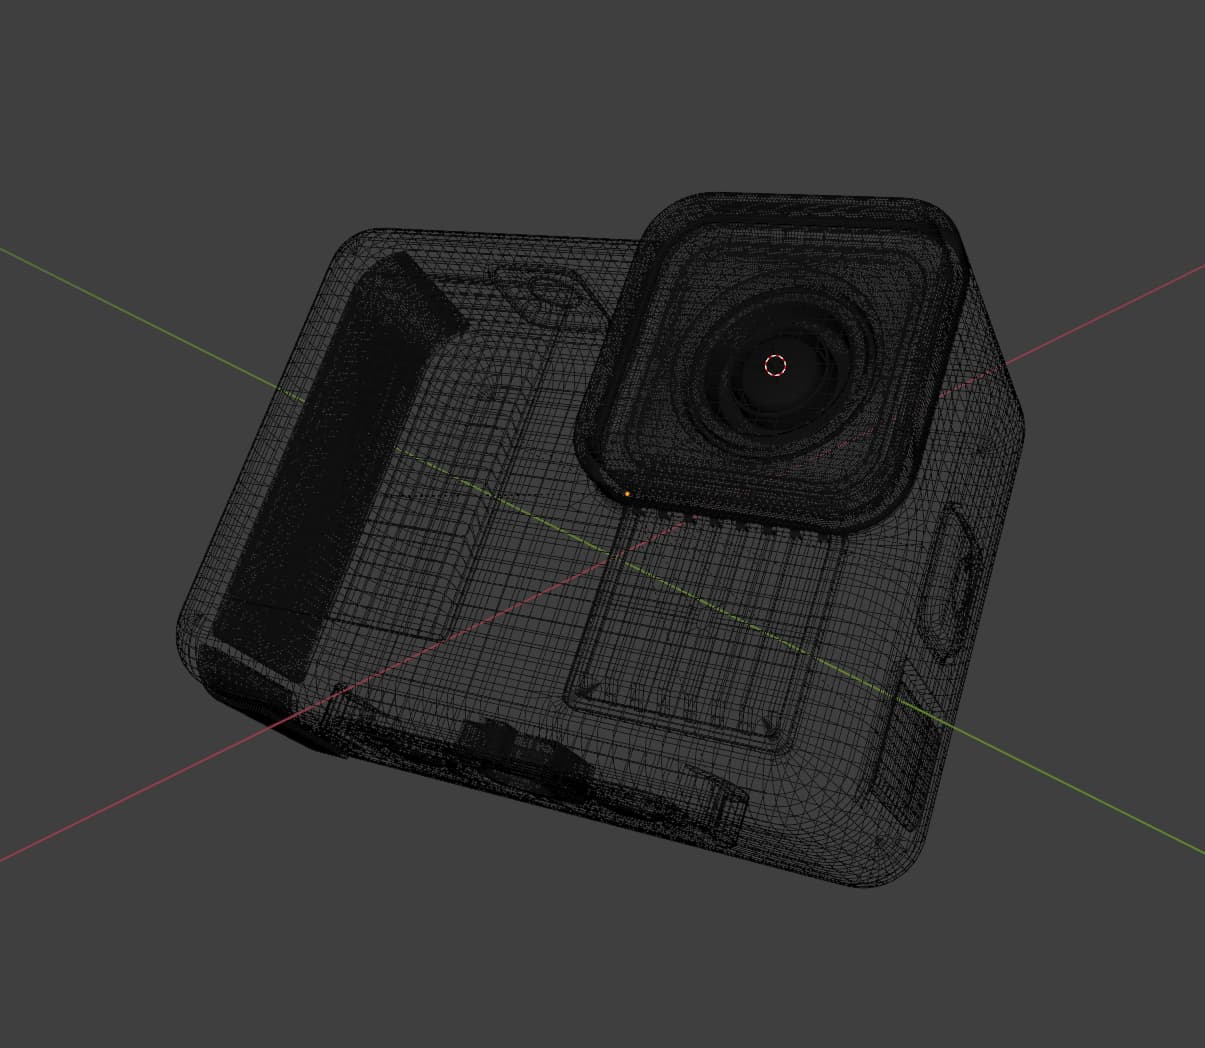
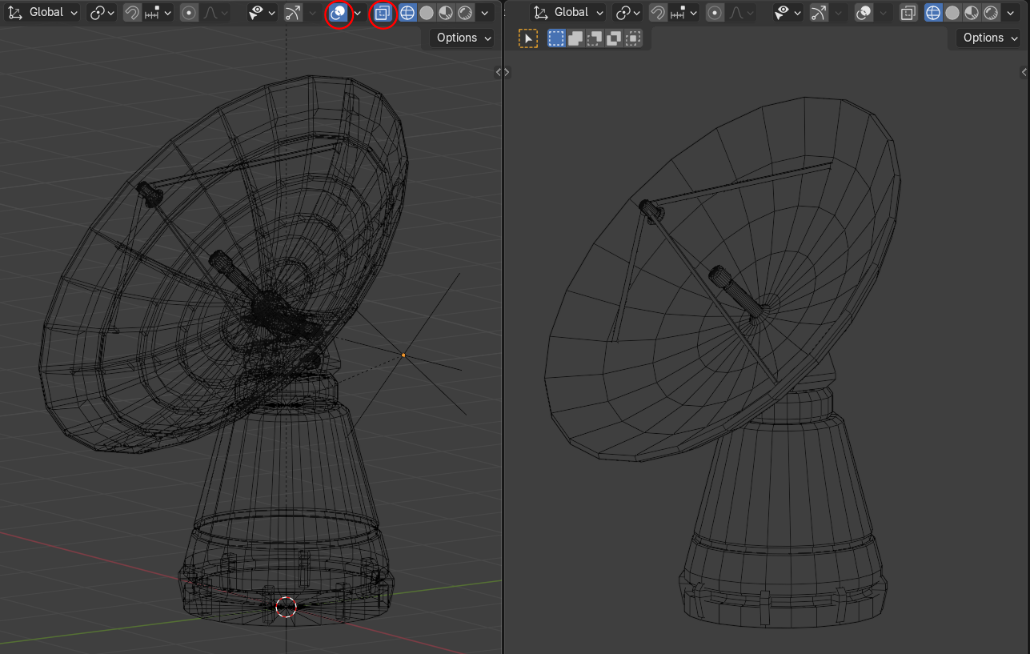
Allow me to humbly share some tips. For the wireframe view, you can turn off the ‘Toggle X-Ray’ button (Alt+Z, see images below) so the one on the back sides will not be shown (not see-through). To make the view clearer, also turn off the ‘Show Overlay’ button (Shift+Alt+Z) to hide overlays like grid/axes lines, 3D cursor, etc.
Left is with the settings all on, right is off. The hide overlays trick could also be applied to the clay/workbench render (your third image).
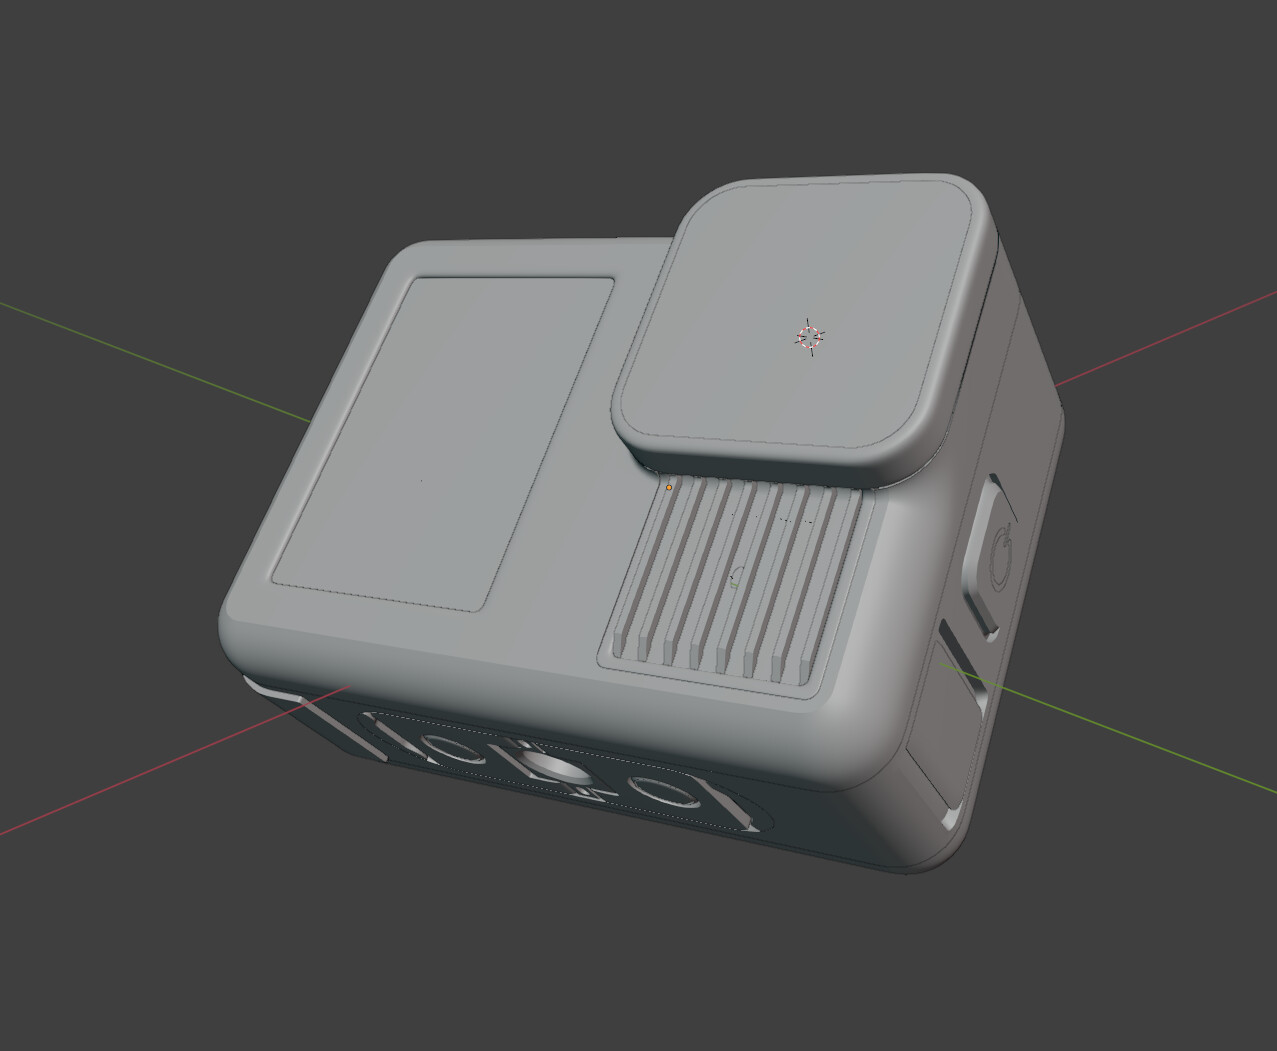
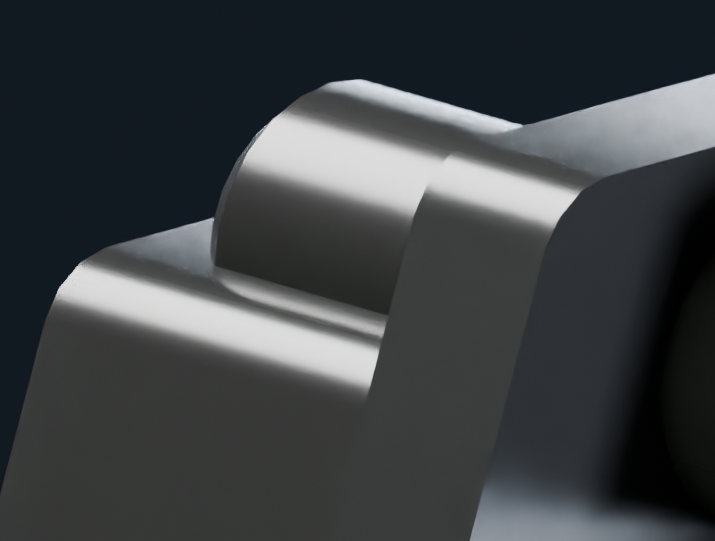
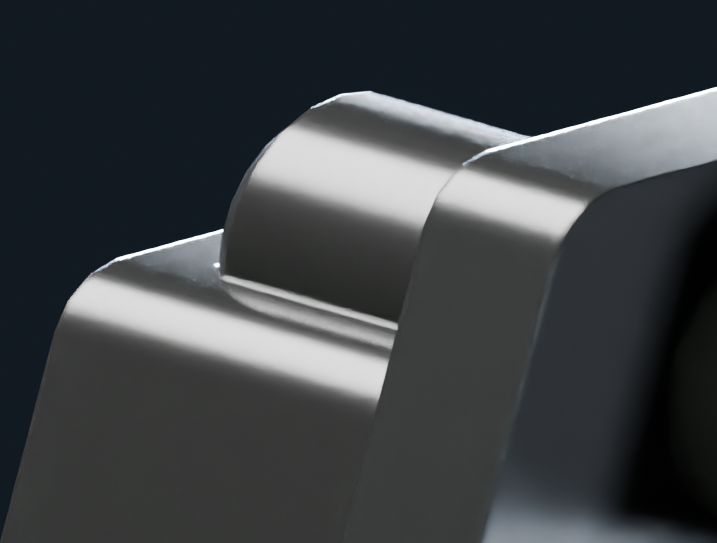
If you have not yet, you can add ‘Bevel’ node in your material setting to get small bevel effect especially on parts that are small or thin without having to model them (from Input > Bevel). At the images below, left one is without the node, right is with the Bevel node pulgged into the ‘Normal’ input in the BSDF shader. Note that you will need to tweak the ‘Radius’ setting, usually at low value so that the bevel will not appear too large.
Finally, for the render itself, indoor HDRI could help with the lighting. You can also add some light sources like point or area lamps to help light certain edges if you want, to help emphasize the highlight more. Start with three-points lighting then add some lamps (in moderation), for example to add highlight on the bottom left and right of the GoPro model.
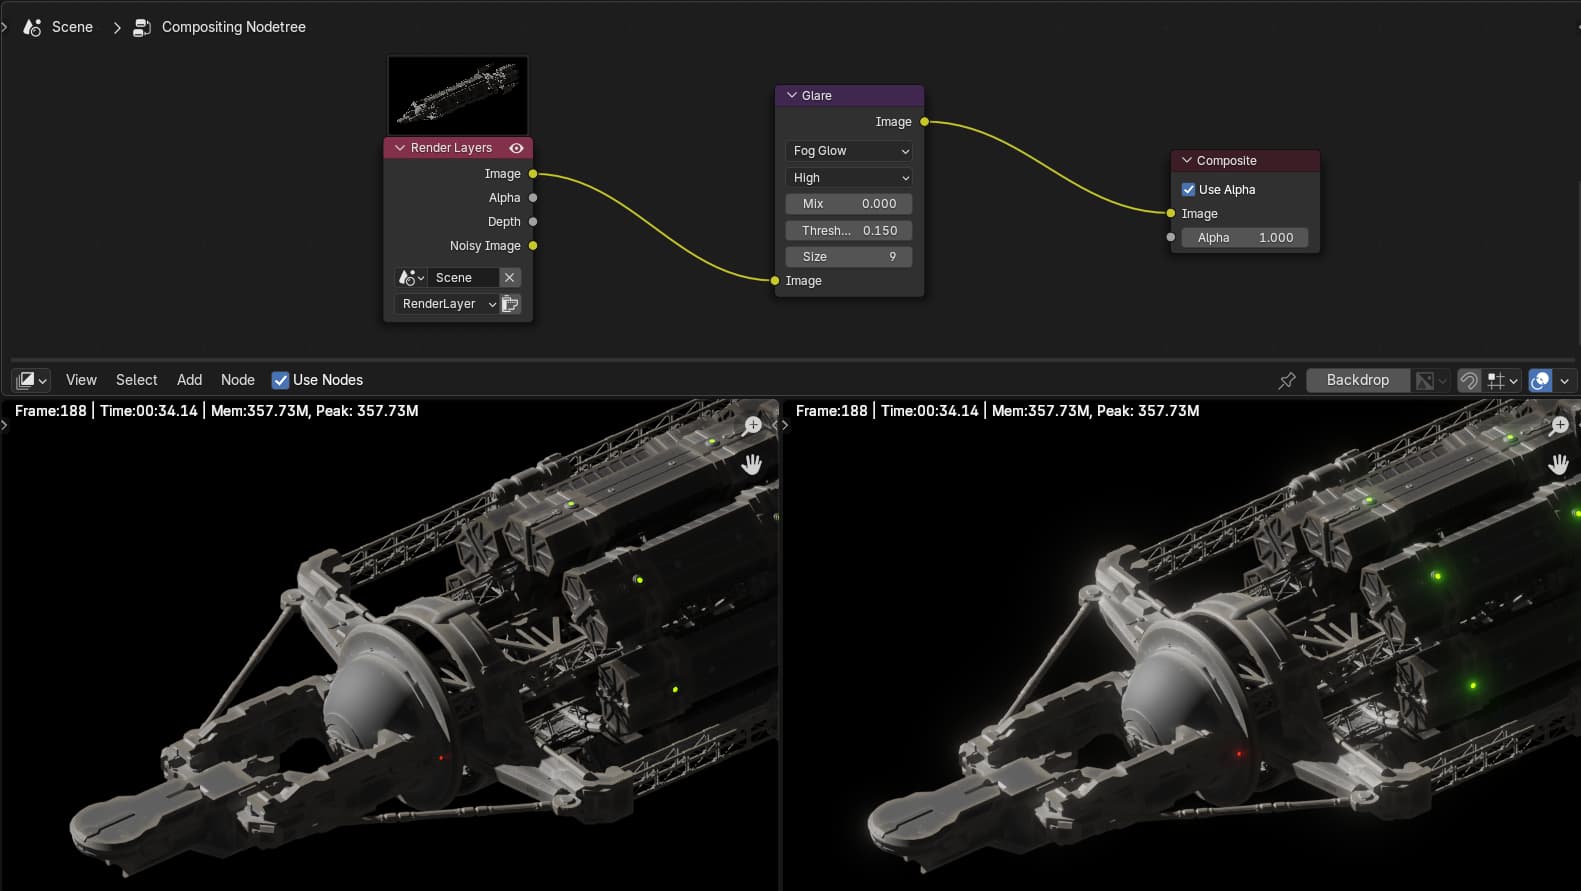
A bit of compositing with a ‘Glare’ node with ‘Bloom’ or ‘Fog Glow’ setting could help the picture to pop more as a final polish. You might need to change the values to suit your needs.