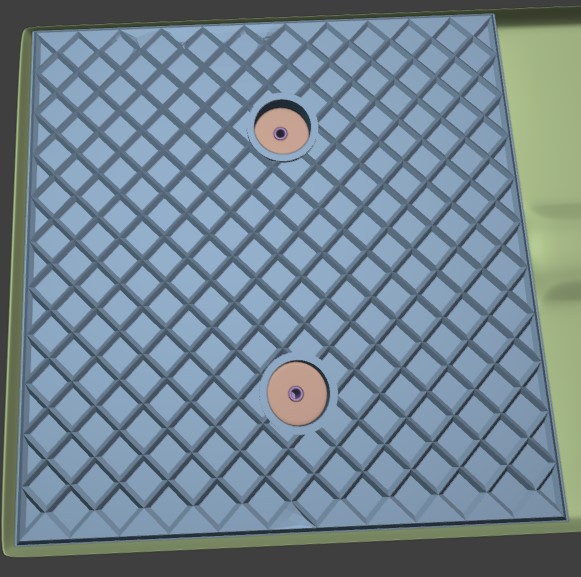
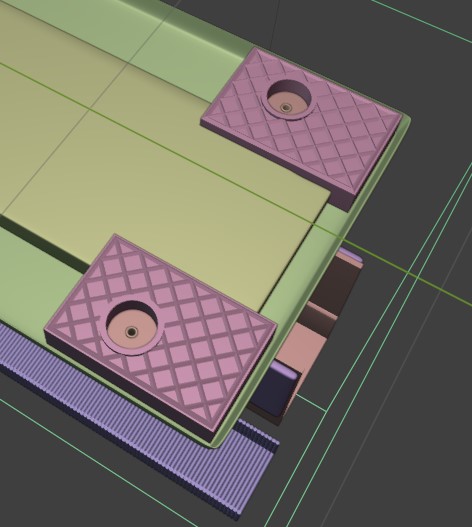
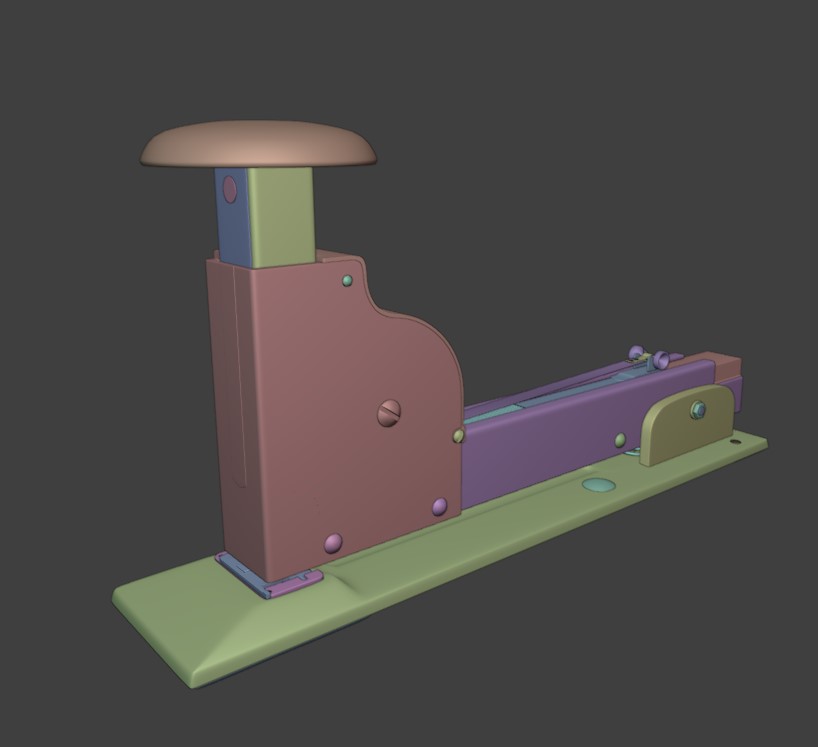
Feet are finished
3 Likes
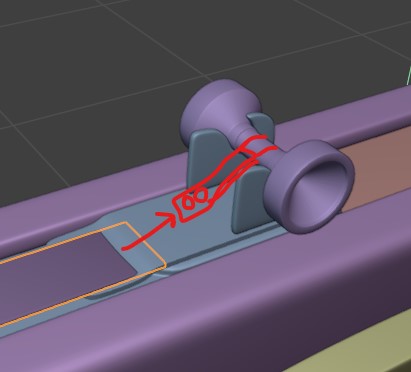
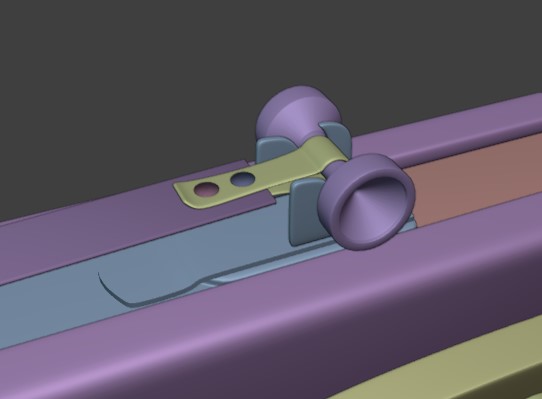
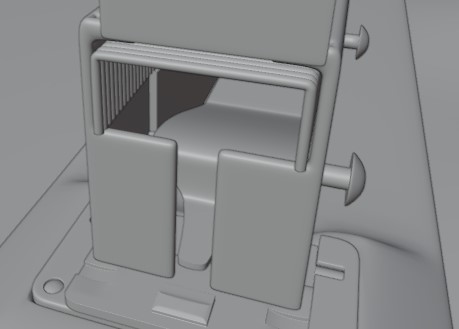
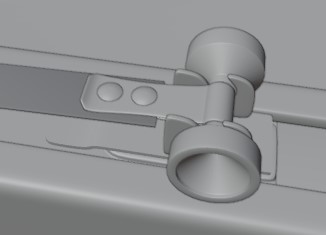
Well, modeling , I think I have one thing I forgot and that is a band the attaches the tape to the slide
4 Likes
I have to look it over , but I believe the modeling is all done , unless I want to do any of the lettering, but that’s probably going to be with textures / materials
5 Likes
I just wanted to say, I appreciate all the comments and likes , I didn’t respond a lot cause I wanted to minimize the amount of comments so it was a more straight to the point, concentrated read. So people could follow the process without a lot of breaks in it. Thank you to everyone following a long and hope maybe you learned something. I will be working on this still, I think I may try to match the photo, I know it’s not perfect, but it’s pretty close and I am happy with that.
2 Likes
Gral this is amazing…
2 Likes
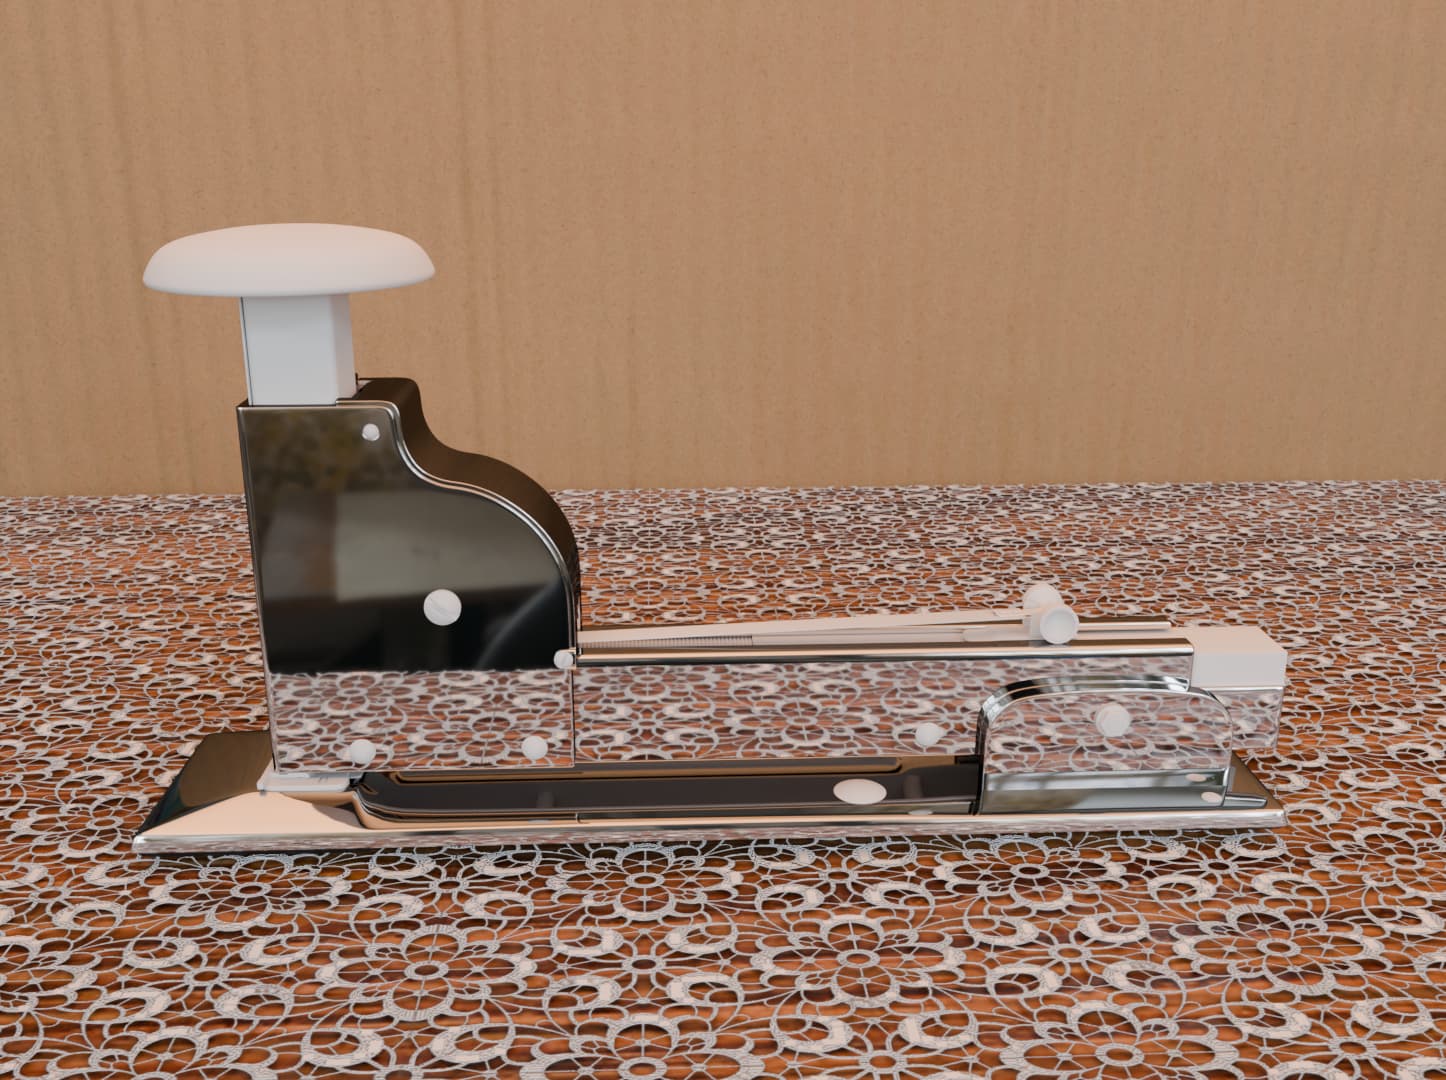
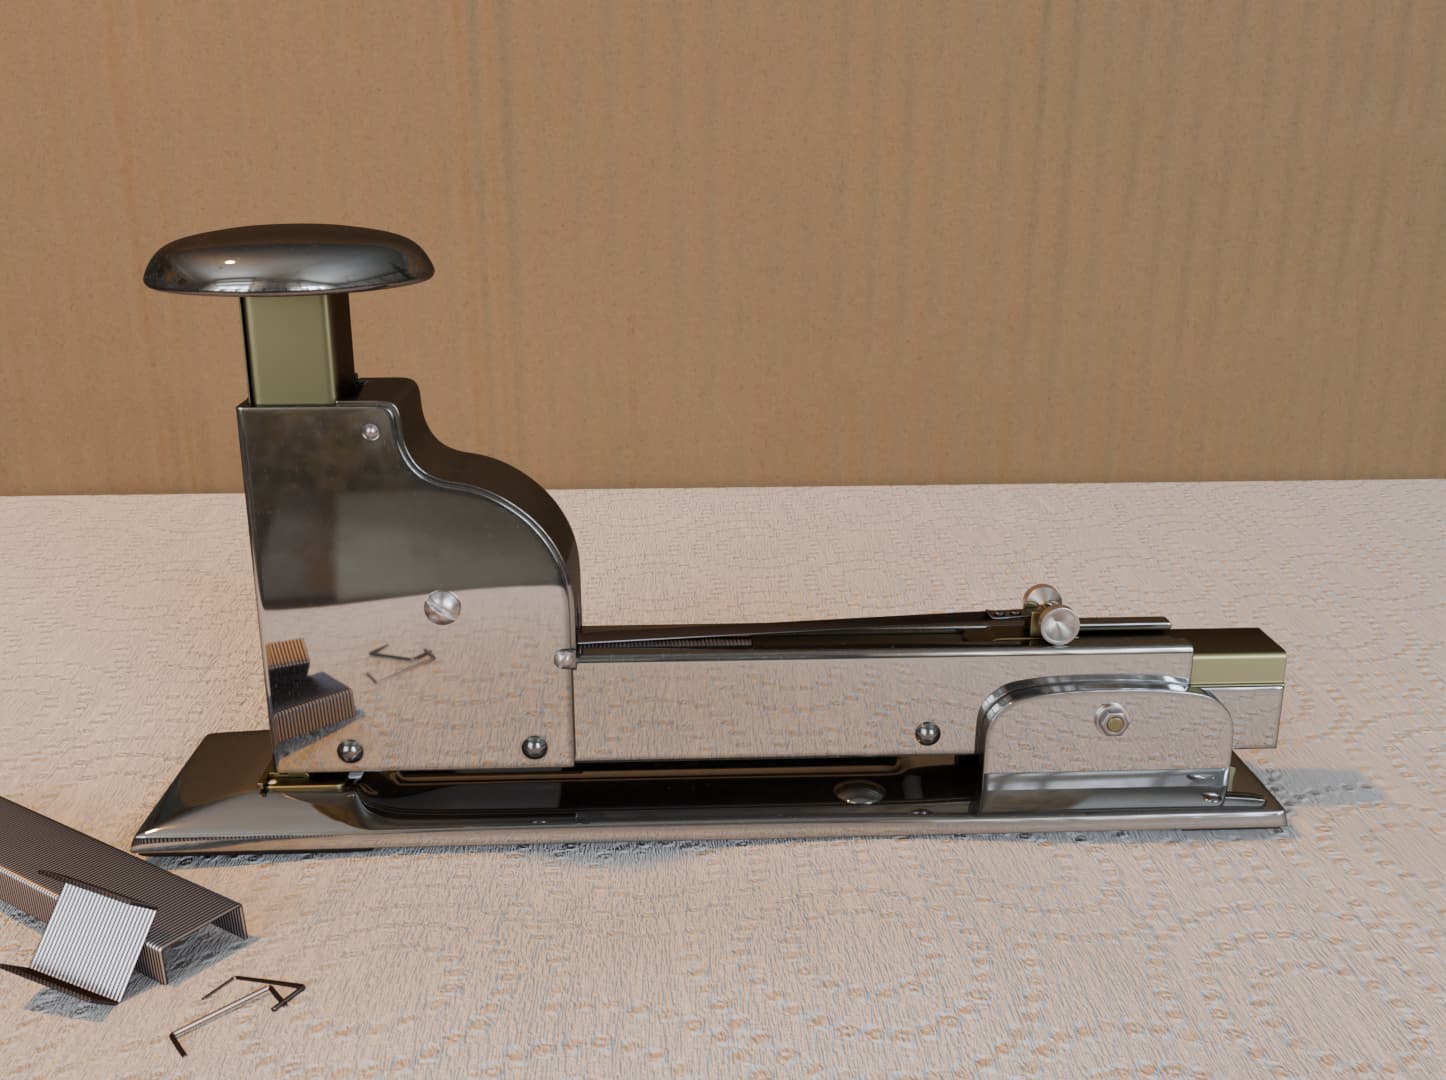
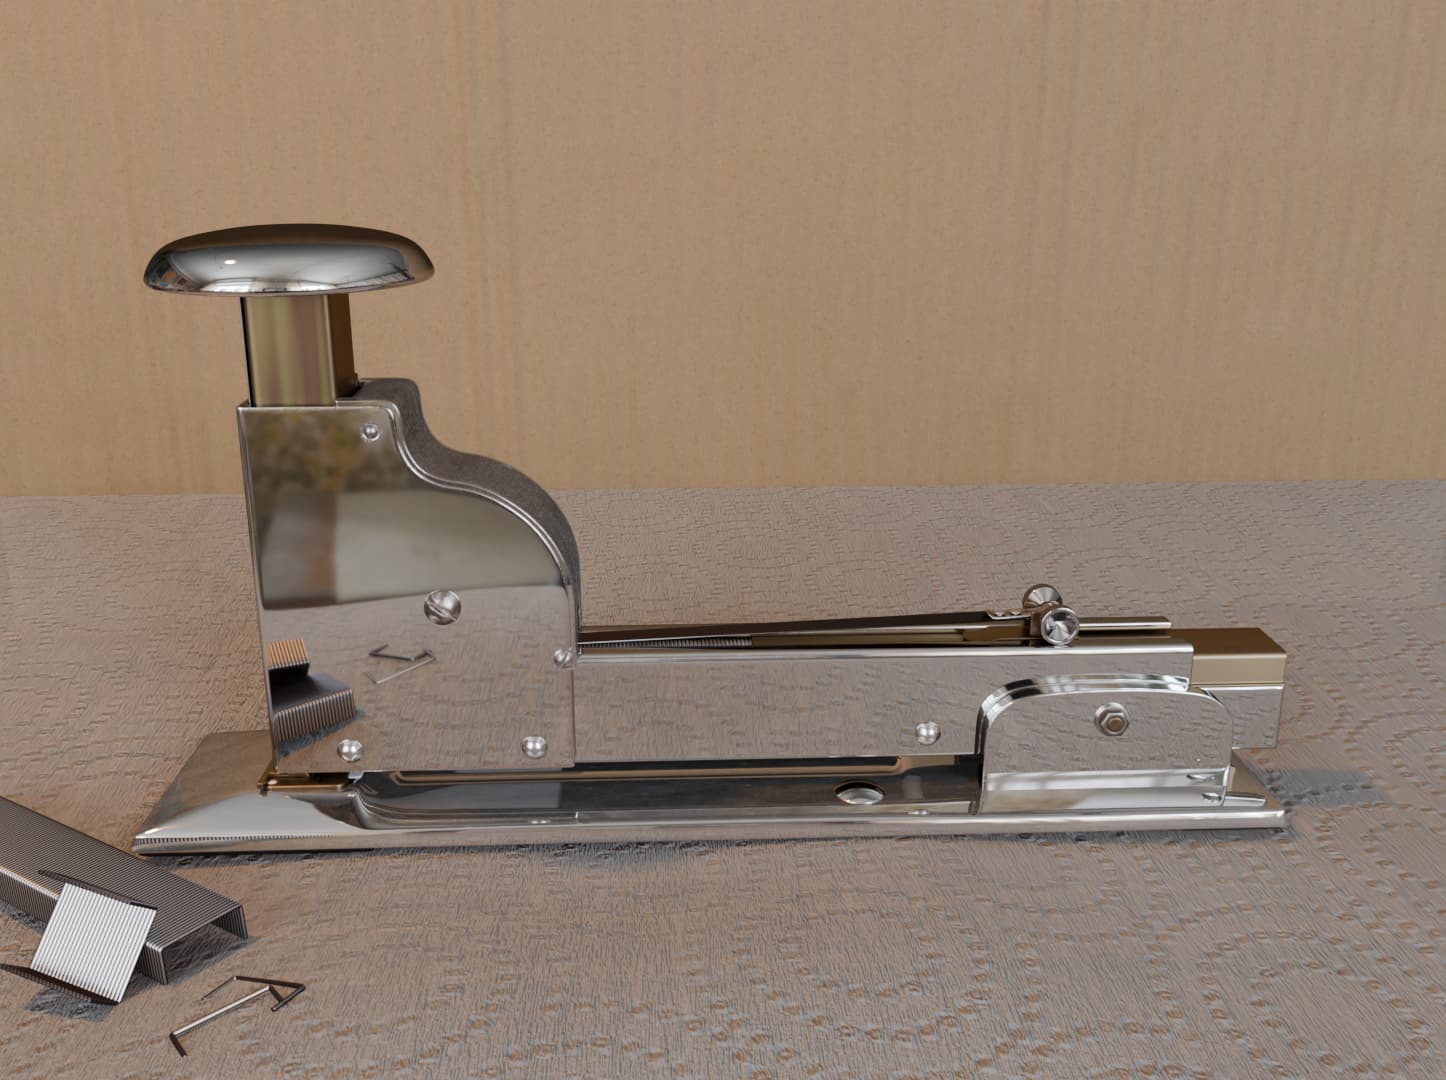
Took some personal time to get some things done, So been trying to make some good materials for a while now, chrome plating, wood table, oh yeah the cardboard and I made like a lace instead of a napkin. matching Focal and resolution. It was difficult to make a good looking chrome, it’s getting there though. I am working out a edge mask currently for it as I am going for realism.
4 Likes
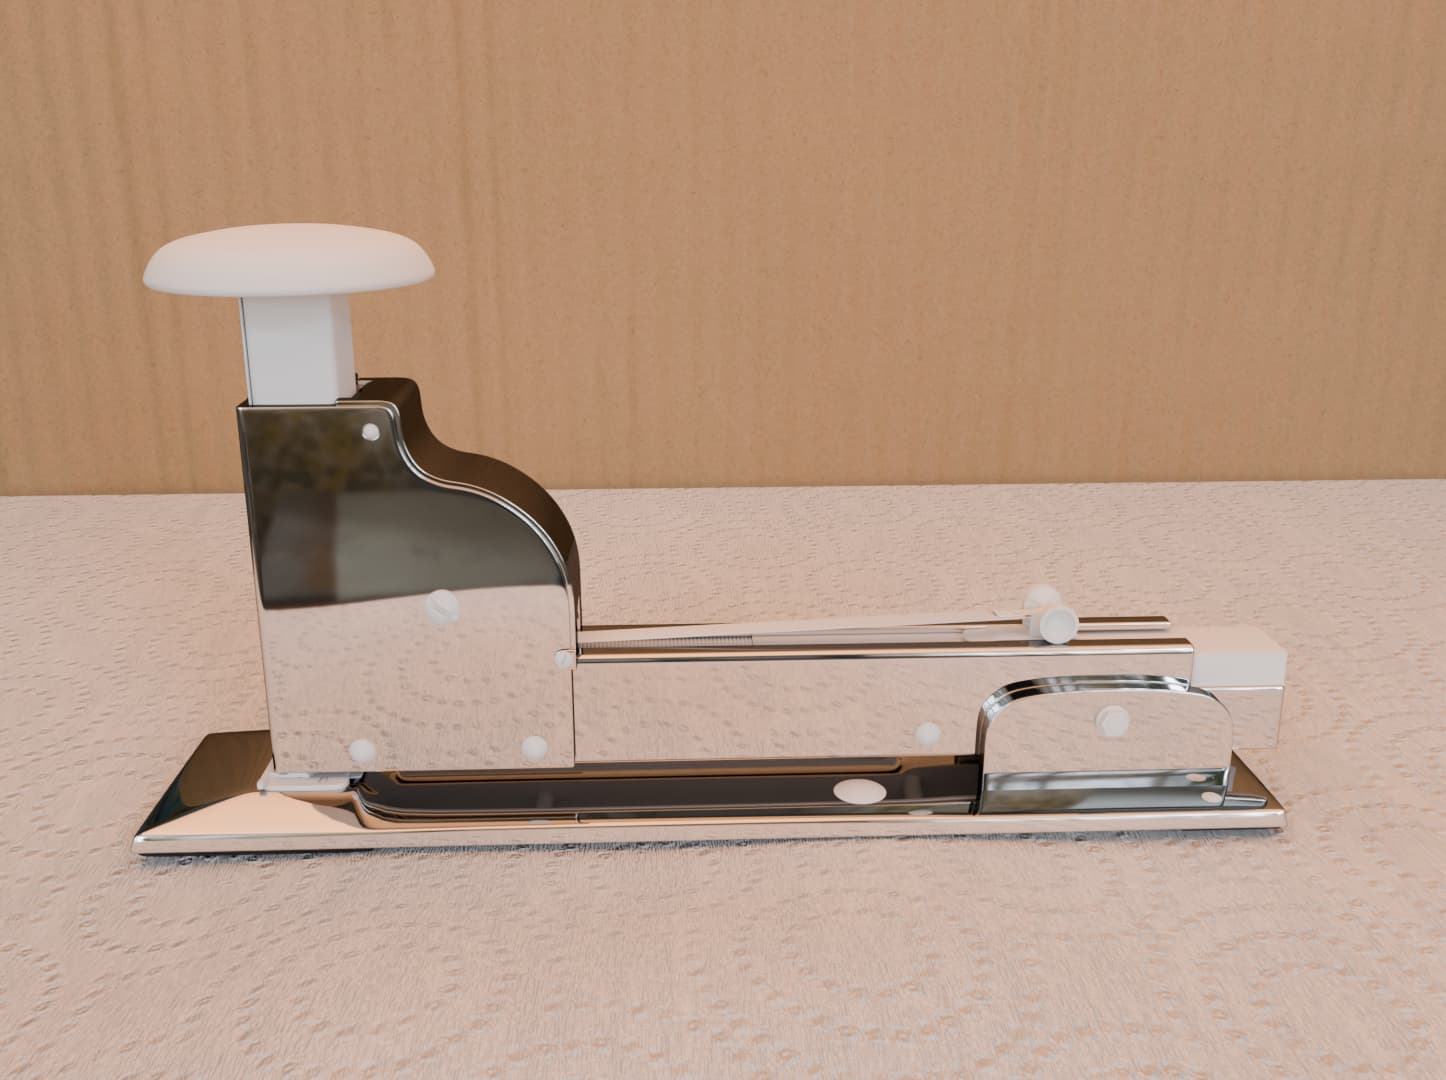
Ok, so Alex told me it was too distracting , that the plain white was better , so I decided to go looking for something similar to the photo then. I am not making a hand tho , so this will do
4 Likes
yeah better and less distracting
2 Likes
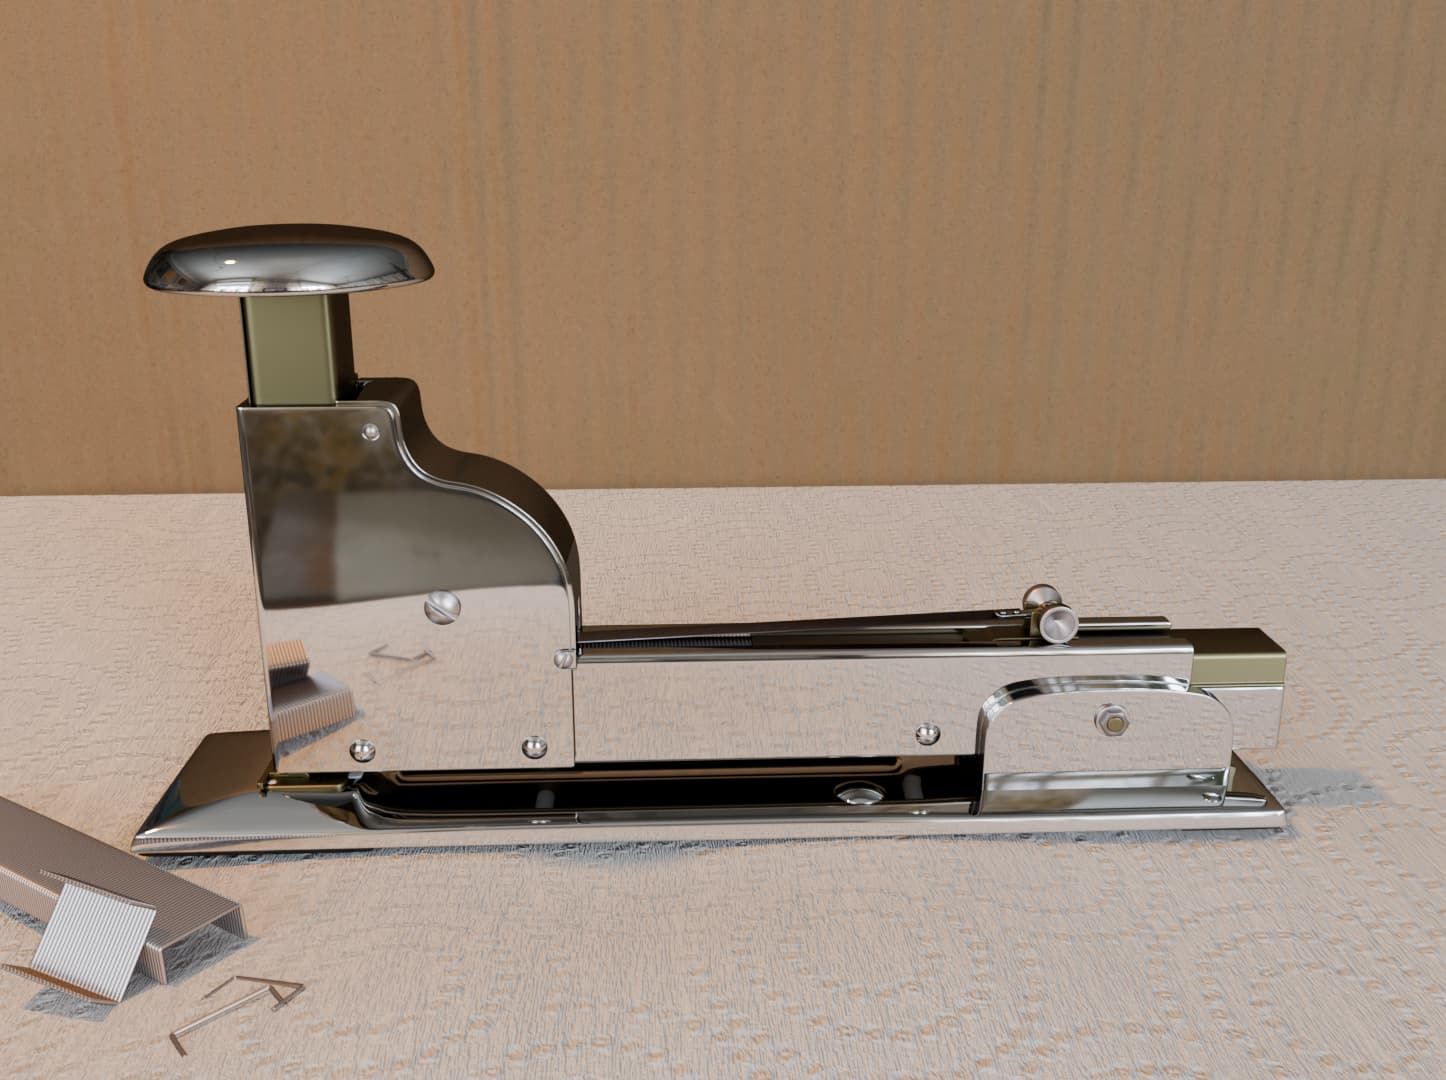
Truth be told, I always break the staples , so decided to add that detail, added a light bulb to help give it that glow to the light. This is a metal rendering test to see what needs tweaked, and made like a titanium looking mat to go with my chrome, got to adjust some mats and work on some masks for weathering and imperfections, got a idea how I am going to do that. Also tweak DOF, make bend in the tape still need to position the model like the spring is engaged. Searching for a font that matches the type on it, Good progress I would say, possibly going to be one of my most realistic renders I have made.
5 Likes
LOL love it, I remember as a kid always breaking the staples apart in my dads staple gun. Was kind of like popping bubblewrap for me. Turned out great man.
2 Likes
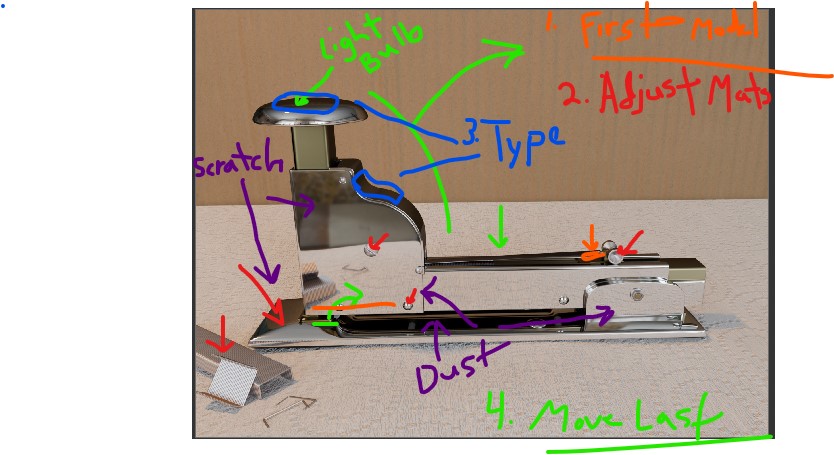
So I forgot to model a part, but its nothing you can see, so I should be able to fix that faily easy, I made a note of the next steps , so I won’t forget the order I need to do this. 1.First , we model missing part, and might enlarge the rivet area holding the tape. 2. Adjust some materials, 3. work on adding some type to the two areas,4. add dust, smudges, imperfections 5 move the neck into a slight upright position. I just noticed my notes don’t match what I typed, but thats the process , I just messed up the numbers on the picture, mistakes happen.
2 Likes
- Modeling missing piece and enlarging the piece on top done.
5 Likes
@Gralous I new you were talking about making a stapler but I did not see this when you began. So just followed your posts. The narrative process will be helpful for many even if they dont make a stapler.
Now that you have finished you should try and do one of those exploding animations showing it come apart them magically assembling itself again like a transformer!!!
2 Likes
Oh, its not done yet, holidays just halted me a little, I am learning and working on making procedural scratch masks right now, and curvature masks
2 Likes
I will hold my breath in anticipation, let me know when i can take a breath of accomplishment.
1 Like
Added a Dust and Scratch pass, unsure if it made a difference, or I didn’t do it right, it does mute some of the shine ,so maybe. Either way I think its time to just move on and sometimes its just what you got to d. I have to add some stamped lettering next and then I think I will call it done for the modeling and texturing for now, I may do a animation later with it or fix the mats once I learn more, idk, at this point I just want to finish it.
5 Likes
Looks great!
1 Like
Ok with some help from Alex I was able to add small scratches on the edges, I didn’t have the mask correct. Added some wear to some areas and fixed my dust on bottom and back plate where it would most likely gather. Now onto the stamped lettering.
2 Likes
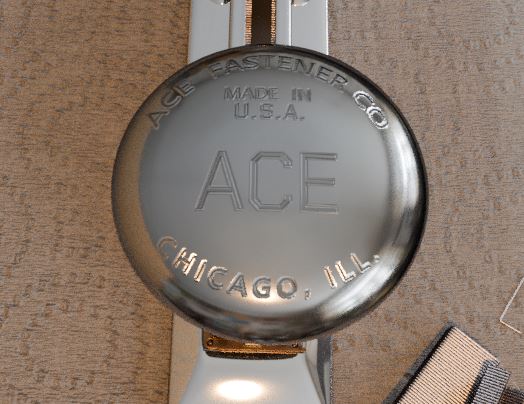
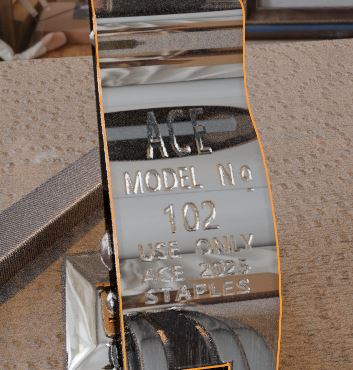
made some normal maps for the stamped metal engravings, counldn’t get that exact fonts, but its close enough.
4 Likes
