Update: Straightened the entire receiver , cleaned up topology up top, blocked out release mechanism and pin/screw placement.

Update: Ton of cleanup done, bevels, added the swivel portion of the receiver to finish the part up.


Update : completed front swivel part ,unfortunately, have to fix cause I didnt make the cutout properly from swivel


Now I realise after posting this that the details where the arrow is , is incorrect, now a sense of dread washed over me. Gotta decide what to do now.
So this explains some alignment issues I was having, but here is my plan. It could become a real problem where I should have started it over , but tryin to avoid that , so the top edge needs pushed down the fins needs to be reversed , smaller areas need to go in like the bigger indentations and the bigger ones out. I feel like I can fix it , so thats what i decided

Bob, you can fix it, yes you can! Go BOB go!
ITS RUINED! FORMAT C: and start again.
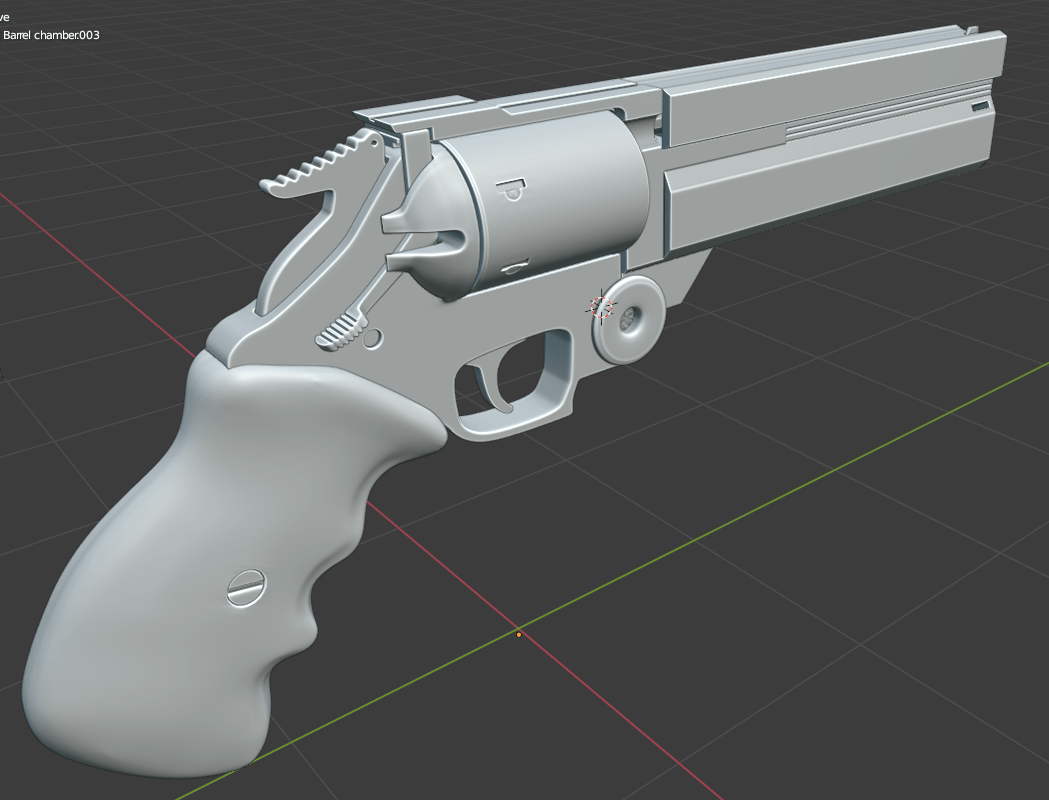
Fixed problem , but now I noticed that the bottom angle doesn’t go back all the way and the plate has to be extended

Update: I am so pleased with this soo far, did a lot of clean up, gotta fix the curve part noted and the rest of the topology. Glad I didn’t start all over on it.


Time for another update, I collected a bunch of good reference images with more details from the anime, in doing so I found out that the gun was way too tall, so brought the top of the gun down. all the topology on the side is fixed. Now I need to work on the rear sight and front sight panel and the groove for the latch


I thought I would share the road map for this piece and when all is said and done, there will be 4 panels, numbered here that will be removable revealing a chamber and platform that was hidden by them. This is why I created the indentation indicated by the arrows as a guide ,and that long area indicated by the X’s will all be removed, This is why I did all the topology and planning which steps to model before this step, because once I remove that , and merge the middle chamber , that piece is basicly done and I can work on the inner parts for it. First I have to finish the top tho, and finish the barrel joined in and can’t get a head of myself. I have kept these steps in a certain order so not to run into anything that is not fixable.


After some mistakes , finally got it all cleaned up, and after looking at the new reference images , had to bring the top down more and create the curve for the rear area

finished the chamber area above the barrel, made a hole for the begining of the inner parts, created the front and top break away panels including the sight.


@Gralous When you take on a project you show what should be done. You take your time, you want to do it right. (flashback to mechanical pencil and lightshade). Keep going. You almost at the finish line!
Other than HOP. I am all over the place. Hardsurface, sculpting, grease pencil, hardsurface, physics, texturepainting, sculpting, Nodes, animation, hardsurface…The joys of Blender that does it all!
I want a slice of ALL the cake! when I should settle down just taste sweet victory of just one! and move on…

